
I previously mentioned dumping memory contents using SPI, with a BusPirate. Sometimes that’s not feasible – such as if the flash memory module is a little inaccessible and you’re not feeling like deconstructing the board just yet.
An alternative is to pull memory over JTAG. I talked about accessing JTAG and interacting with a chip using OpenOCD previously, however this time around I’d like to go a step further.
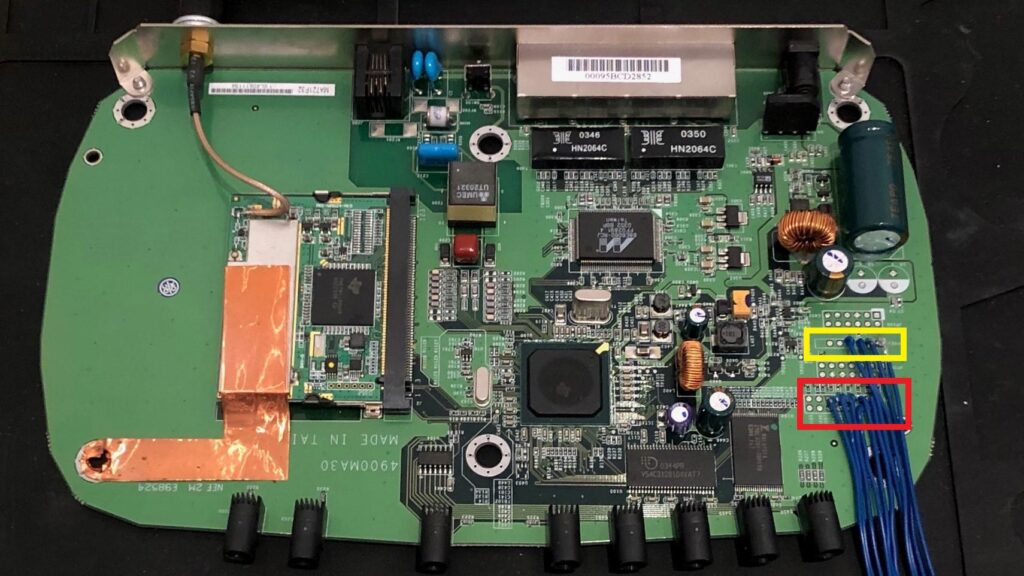
The board I’m using in this example is a Netgear DG834Gv1, which has an exposed JTAG, shown below on the bottom right of the board (in red):
I’ll pick up from where the previous post about JTAG left off, at that point we had connected OpenOCD to the device and ran “scan_chain”, which I use just to confirm communications are working as expected. However now we’re going to set up an additional config file which maps out the CPU and Memory.
We’ll need a few details about the chips – on this board their markings are visible which makes things a little easier. For example, the CPU can be seen near the centre of the board – marked TNETD7301GDU. This will lead to the data-sheet which will lead to the information required for the config file. For example, the data-sheet says it’s a Texas Instruments AR7, which is a MIPS architecture.
It’s worth pointing out that for the DG834Gv1, OpenOCD already has a configuration file – but I’ll include what I’m using here so you can take a look at what it contains and what each part does:
adapter_khz 1000
transport select jtag

set partition_list {
 all { "All 4MB" 0x90000000 0x00400000 }
}

jtag newtap ti-ar7 cpu -irlen 5 -expected-id 0x0000100F
target create ti-ar7 mips_m4k -endian little -chain-position ti-ar7.cpu
flash bank ti-ar7.norflash cfi 0x90000000 0x00400000 2 2 ti-ar7
So with the above, we’re configuring information about the CPU architecture, and the flash memory we’d like to interact with. On this board there is 4MB of flash (determined by looking at the chips on the board and finding their data-sheets – then this is defined on the last line of the config file with the flash bank command). The CPU architecture is given as a target create command, are defined as MIPS.
We’re setting it up to pull the entire flash contents over JTAG here. If you would like to pull a “piece” of memory instead, you can arbitrarily alter the “partition_list” variable by changing the start (here that’s set to 0x90000000) and length (which here is 0x00400000, that’s hex for 4MB) variables.
So above I’ve just configured “all” to refer to the entire memory content – but alternatively you could configure something like this:
set partition_list {
 loader { "Bootloader (ADAM2)" 0x90000000 0x00020000 }
 firmware { "Kernel+rootfs" 0x90020000 0x003d0000 }
 config { "Bootloader config space" 0x903f0000 0x00010000 }
}
This set up is sourced from the OpenOCD configuration file for the DG384v3 board and shows how you can separate bits out from the memory, if you know the layout and only want a specific piece. However, this “partition” separation isn’t mandated, you can (as with my config file above) pull out the whole thing. Separating it in the way the OpenOCD file does allows you to optionally pull specific areas of memory if so desired.
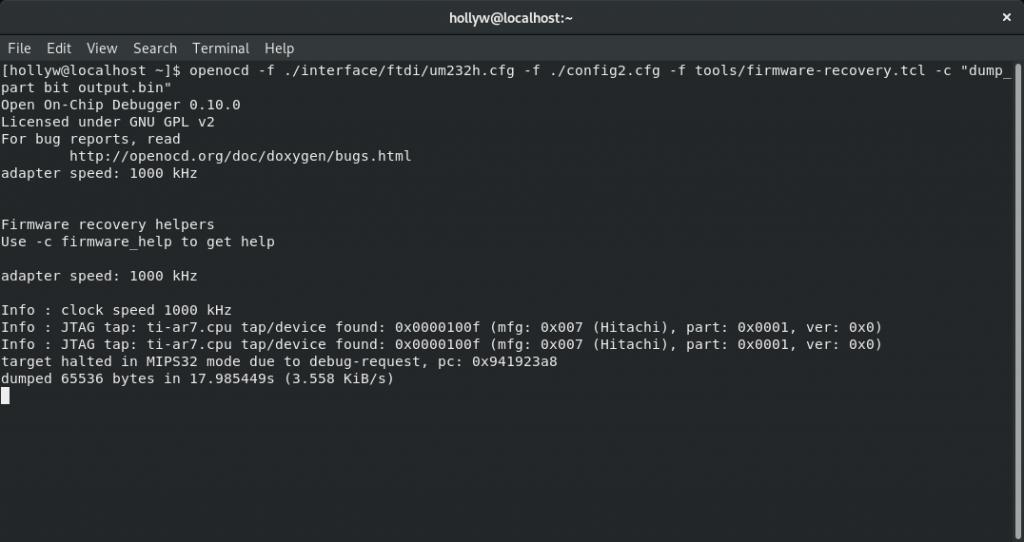
To actually extract the contents, the above configuration file can be supplied along side the configuration file for your JTAG interface (as before I’m using a UM232H) and the firmware-recovery tools files. Then you can extract the memory like this:
openocd -f /usr/share/openocd/scripts/interface/ftdi/um232h.cfg -f /home/hollyw/config3.cfg -f tools/firmware-recovery.tcl -c "dump_part all output.bin"The above command will load the configuration for the UM232H, which as mentioned in previous articles is the JTAG interface that I’m using. It will configure the architecture and memory layout – defining an “all” partition referring to the full 4MB of flash. It then loads the “dump_part” function from firmware-recovery.tcl and uses it to output the flash contents to a file called output.bin!
That’s it!
HTTP Header Injection
HTTP Header Injection vulnerabilities occur when user input is insecurely included within server responses headers. Specifically they are based around the idea that a threat actor can cause the server to generate a response which includes carriage-return and line-feed characters (or %0D and %0A respectively in their URI encoded forms) within the [...]| Play | Cover | Release Label |
Track Title Track Authors |
|---|